Wednesday, March 27, 2013

A DIY Shabby Chic Scrappy Tutu {No Sew!!}

So I fell in love with this skirt from Lullaby Birds on Etsy... I blame Pinterest!! And when I decided I wanted to do a shabby chic country garden theme for little sis' first birthday... I knew I had to have one!  The problem: my hubby might shoot me if I spend $30 on a skirt for my little one AND it was just the wrong colors.  So, what was I to do but make my own!

Now, by all means, if you have tons of quilting scraps laying around, use those!  I didn't and as I mentioned before, I was after certain colors, so I made my trusty trip to JoAnns, found the first paisley print that I just fell in love with and found five other fabrics to compliment it..
I bought 1 ft. of each fabric, which was more than enough and spent less than $10.  And luckily, my girlfriend let me borrow her rottary cutter and cutting board, so this went super fast and easy!!

I measured from sis' waist to her knees and got 9".  I doubled that and added one inch for tying.
EX: Measure from waist to knee ___ X 2 + 1" = length of strips
Next I measured her waist... 18".  The way I was tying, I needed 2 strips for every one inch.
EX: Measure of waist ____ X 2 = the amount of strips needed.
We used 36 (19" X 2") strips of fabric for her tutu... she is one year old!  For older kiddos, I would probably make the strips wider along with adding the appropriate length and amount needed... possibly 3"strips?  This tutu hit just above her knees.
 You could easily use elastic for the waistband, but I chose ribbon.  I cut enough ribbon to go around her waist plus extra on each end for tying a pretty bow.  To begin adding the scraps, I used a chair and tied the ribbon to both legs of a chair to hold it tight.  I started in the middle, using a double square knot to tie the strips snugly on and worked my way out.  I had 6 strips of 6 different patterns... and because I am slightly OCD, I tied mine on in the same pattern every time.  NOT necessary at all... unless you are like me, lol!
 The entire tutu took me about 1 hour from start to finish.  I couldn't beleive how quick and easy and ADORABLE it really was!  A few pictures of the try on...

and in the cherry orchard...
and in front of the old white barn :)
Thanks for stopping in, and thanks again to Lullaby Birds for their great inspiration!

UPDATE:  See the birthday girl in action in her super cute outfit HERE!


Linking up:
 photo blogbutton_zpsb1fa0f6d.jpg


Monday, March 18, 2013

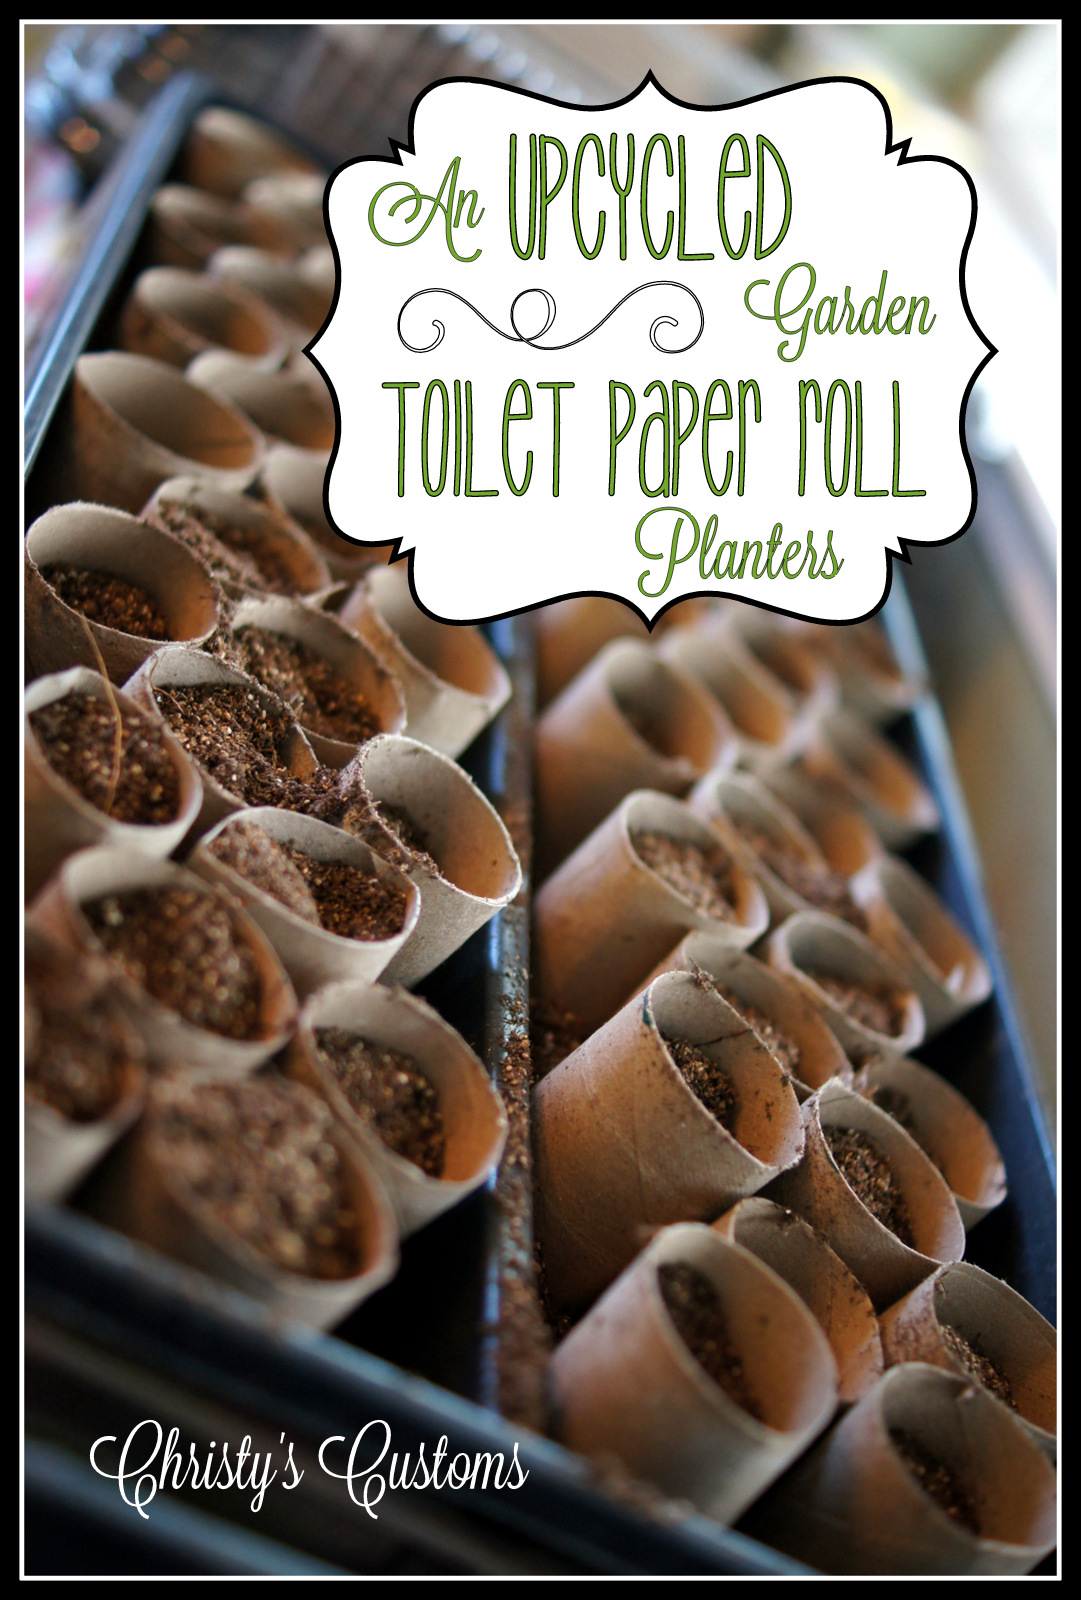
An Upcycled Garden: Toilet Paper Roll Planters

It is sprint which means... time to PLANT!  I love spring and I love gardening.  It is so fun to get something of value out of something of very little to no value.  The past few years we have been planting from seeds so we aren't spending money on buying plants, but we usually start them in the little mini green houses (just wait till you see what I found that makes a perfect upcycled green house!) and compostable containers that you can get from your local garden center.  This year I am on a mission to find things we can re-purpose... and the little compostable planting containers were the first to go!  In their place??  Toilet paper rolls!
We saved toilet paper rolls (and paper towel rolls too!) for about a month and just cut them in half (or in fives for the paper towel rolls).  We placed them so they fit snug in our little green house starter container then filled them with dirt, planted them with seeds, and kept then moist in a sunlit window.  Because they have no bottoms, we were careful not to bump them too much. 
After a few weeks they had sprouted and were ready to be transplanted.  You can see that some of the toilet paper rolls started to unravel a bit, but it did not seem to disturb the plants. Plus, I unwrapped before planting anyway!  However, you could most likely plant with the rolls still on and have no issue!
The most curious thing I noticed about doing it with the toilet paper rolls is that the roots grew along the bottom of the tray and did not ball up like when confined to a container.  You can see how long and nice they were and I am expecting these plants to do well now that they are planted! 

I have some other fun bits and pieces of upcycling that I am going to share for the garden... but I am curious... what have you upcycled to use in the gardens??


Thursday, March 14, 2013

DIY Superhero Capes {Printable Templates Included!!}

Well big sis wanted a superhero birthday party for her 4th... so what else was there to do but to make superhero capes!!! {You can see her party here}

I searched on-line and found a few tid-bits here and there, but nothing that really seemed to help all that much, soooo, we basically started from scratch!  Lucky for you, if you ever need to make a superhero cape for your little angel, I saved everything I did right here!

The first main decision came down to time and money (doesn't it always!?).  I decided to go with a felt cape versus a shinny material because 1. it is super cheap and 2. it won't fray so you don't have to break out the sewing machine!  Once I decided that, I gathered the following materials...

Materials:
Felt by the yard (2ft. cut length per every two capes needed)
A pack of assorted color felt sheets for the emblems
Spray Adhesive
Velcro squares or 1" Velcro to cut
Christy's Customs Superhero Cape Template
Christy's Customs Superhero Cape Shapes and Letters Templates


{The template above is designed to print out on normal 8 1/2 X 11 printer paper.  Download the template by clicking on the above link and saving each of the seven pieces.  When printing, treat the JPEG file as a picture.  Choose 8 1/2 X 11 paper size and choose BORDERLESS printing.  The borderless printing will preserve the correct proportions of the template and is usually only an option when printing pictures.  I personally would choose to print in draft to save ink.  Once the template is printed, you simply lay the pieces out and use tape to hold them together.  Cut along the dark line to get your cape template.  This cape size works well for 3-6 year old children}

Lay out your felt (most is sold doubled over- I left mine so each template cut out resulted in two capes) placing the template on top.  Use a washable marker to lightly trace the template.  Cut out.


Using the Shapes and Letters template above, print out the shape for a background and letter for the child's first name.  Cut out and use for templates on the assorted color felt choices.  Using spray adhesive, coat the back of the felt shape, place on cape, and felt letter, also placing on cape.


Now the Velcro to hold the cape on... oh how I wish I could tell you to spray the back of the Velcro and stick it on too... but you will need something a bit stronger than spay adhesive to hold on the Velcro... ours pulled off after the first hour or so.  A few stitches would be best to add on your little cape neck closers!

And wha-la!  Happy little superheros!

For age reference... big sis had just turned 4 in this picture, while cousin is 6 1/2.  The capes seemed to work well for both sizes!


And- KAPOW!  There you have it!  Super simple.  I did 8 of them in just a couple hours one evening and gave them as party favors.  I wish I had taken a picture of all of them, but in the rush of the party, I forgot- oh well! 

I'd love to hear if you use the templates... I'd love to know that someone else got use out of them too :-)  So please share if you do!


Friday, February 15, 2013

A March Chalkboard Printable

In my quest to do a printable for each month of the year that can easily be switched out, here is March!  I found this super cute Irish blessing and thought it would be perfect for a March printable!
This is meant to be printed as an 8X10- just send it to your local print shop.  I keep mine all in the frame together so they can just be switched out as the year goes by.  Click HERE or on the picture itself to get the downloadable file!

{Pssss- Looking for Subway or Chevron St. Patty's Day Printables- we've got em!!}
http://christyscustoms.blogspot.com/2014/02/a-printable-subway-art-with-chevron.html


Looking for January or February??  Just click on these little guys :)
Enjoy, and as always, thanks for stopping in!


Thursday, February 14, 2013

A Skittle and Rainbow Valentine for the Hubby


Just a last minute share here... because of course the hubby would see if I posted it earlier!  He loves his Skittles, especially with all the new creative flavor combos!  We bought a bunch and mixed them all up in the glass jar- let's see if he can tell them apart :-)

In all seriousness, I love this guy and have a ball making him his own little custom Valentine each year... this year it reads, "You light up my rain, no colors refrained."  And he does, he lights up my rain!
Happy Valentines Day!


Tuesday, February 12, 2013

Creating Our Own DIY Handprint Valentines

I have always made my hubby's Valentines.  He may think I am crazy, he may hate them, he may adore them- I have no clue, but since we first started dating, I have always made his Valentines.  Sometimes it has been collages, other times it has just been simple cut out hearts, but almost always it reflects something going on in our lives.  I like to make them... I like creating something with my own two hands instead of buying some card invented by some random person I don't even know.

So a few years back when my oldest daughter came along, it was only natural that daddy get a Valentine from his little girl too.  Well, it's that time of year again and this year we have one more little lady to add in to the mix and our Valentine making has been extended to Grandparents as well (because they just love getting them too!).  Because both girls are still fairly young, I combined both of them into one Valentine and created a fun little design on the computer (that I could just print out multiples of instead of hand writing them all!) to do their hand-prints on.

We used washable Crayola paint and I like to actually paint onto their hands.  This year big sis was able to paint her own hand- HUGE fun, lol!


Big sis had to switch up the colors for each person (of course), but after doing little sis (9 months old) once, I decided she would just have to stay purple the whole time.  We did all of hers in one fell swoop, then let big sis take her sweet time.  They had a blast!.  To back the Valentines, I just used some old scrap-booking paper that I don't plan on using for anything else, glued on our little hearts, and cut with some scallopy scissors.  It really only took us about an hour from start to finish.
After they had time to dry, I went back and wrote each girl's name along with this year's date.

We will be delivering Thursday!  Fun times!  So, I am dying to know- anyone else crazy enough to make their own Valentines each year??


Oh- and if you like the little 'HAND/heart' background I used, you can download it by clicking HERE- it is saved in my google Drive :)

Thursday, February 7, 2013

DIY Bleach Dyed Fan Shirts

This year our team was in the Super Bowl- fun stuff!  A couple of days before the big game I decided it would be fun to try and make some shirts for me and the girls... well, honestly, more like the day before :)  I remembered seeing a cool bleach "dying" method on Pinterest from one of my favorite blogs, Six Sisters' Stuff which you can see here!  I kind of read through it for some helpful hints, then thought, "I've got this!"  Sometimes that thought can be disastrous... but this is a super easy process!

I started out by creating this graphic.  If you happen to be a San Fransisco fan, feel free to steal it {Click here for graphic} or print out any graphic of your choosing!  We are having College Day at school every Wednesday and many of my students don't have college related clothing- I was thinking about doing this simple process with college initials for them as well!
 
I already had a roll of contact paper, so I decided to use that!  I simply taped the printed out graphic onto the contact paper then used an exact-o knife to cut it out... being careful to not cut out the whole center so the whole piece was still intact like a stencil (compare the graphic above to the final design so you can see what parts I did not cut!).
 Next I peeled off the paper backing and placed the graphic stencil on the shirt making sure it was well adhered in all places.
For the bleach solution, I used an empty and well washed hair spray bottle.  I filled it 2/3 of the way with bleach filling the last third with water.  As the Six Sisters post suggested, I used a piece of cardboard from a cereal box to place inside the tee shirt to keep the bleach from soaking through.  Next I carefully sprayed a thin layer and waited...
While Six Sisters suggested waiting up to 20 minutes... me of little patience found other ways, lol!  After waiting the first minute I started seeing instant results but wanted more... I gently dabbed the puddled bleach off the stencil part and sprayed a bit more.  I waited about 1 minute more before it hit me- BLOW DRYER!  At this point the hubby was looking at me with the you-are-slightly-crazy-why-can't-you-just-wait look, but I didn't want to wait.  Then I got the this-will-not-work look, but it did!  The blow dryer intensified the bleaching process!  I sprayed a little more on and blow dried again till I was happy with it.  Once I felt that it was a large enough contrast, I carefully peeled the contact paper off and dunked the shirt in the bathtub to quickly rinse and dilute the bleach.
It turned out great the first try!  I peeled the contact paper off my shirt and put it on to big sissy's shirt and did the same.  It seemed like the contact paper would most likely do three shirts before it would have to be trashed.  Once both shirts were bleached then dunked, I did a full wash to make sure all the bleach was out.  

Oh- and the best part... we got these shirts at JoAnn's for only $3 each!  What a steal.  Only bummer is that they didn't have red onsies so little sis didn't get one.  Maybe next year :)  

I loved this and will definitely be doing it again!  Thanks for stopping in to check them out!


Pin It button on image hover