Showing posts with label printable. Show all posts

Thursday, March 27, 2014

A FREE Playroom Print for those BORED kiddos!

I saw the cutest Pin on Pinterest... a snap shot some witty mom must have taken.  I loved her little whiteboard 'suggestions' so much, I had to make it up into a print!  Thank you mystery mom with a camera for this oh-so-cute idea!

This shows the print framed and matted... but will look like this straight from your local print lab :)
This print was created to be an 11X14 print or an 8X10 print.  To download the two different files, just click HERE!

Are you in search of the perfect print for a playroom, kids room or nursery and just can't find what you want?  I do custom prints as well.  Shoot me a message via email or facebook and I would be happy to give you a quote :)  I also have some things up on my Etsy page... you can find the link to all three places at the top right of my blog page.

Thanks for stopping in!


Thursday, March 6, 2014

A Giraffe Nursery.... a perfect Chevron Yellow & Grey set of Prints

Have you seen an ever so sweet yellow and grey nursery combined with giraffes??  I have and fell in love.  The grey and yellow giraffe nursery was my inspiration for these sweet giraffes combined with the words of C.G. Jung, "Your vision will become clear only when you look into your heart ... Who looks outside, dreams, who looks inside, awakens."
 Thanks for stopping and and taking a look at my latest creation!!

Looking to purchase these prints?  Visit my Etsy Shop!


Sunday, March 2, 2014

Hot Air Balloon & Somewhere Over the Rainbow Watercolor Children's Room Prints!

I have combined a handful of my passions to take a swing at creating some beautiful art pieces for children's rooms or nurseries.  I love the idea of combining quotes with beautiful pieces of art or graphics.  This is one of my first pieces, combining Hot Air Balloons, rainbows and the ever so famous "Somewhere Over the Rainbow" song quote from Dorothy in The Wizard of Oz.


How did I create this?  I started with a basic concept of the quote and the general image.  After sketching the image out over three sheets of paper, I water colored in the color.  Once it was dry the images were scanned into the computer where I used Photoshop to add the famous quote.

I'd love to hear what you think or your favorite quotes for children's rooms!  I am compiling a list of others that I would love to create pieces for.

Interested in buying these printable 8X10 files, visit my Etsy Shop!

Thursday, February 13, 2014

A Printable Subway Art {With Chevron Option!} for St. Patrick's Day

My partner in crime has a little thing for St. Patty's Day... in fact, she sends out cards for St. Patrick's Day instead of Christmas- very cute idea!!  Since I have been playing around in the custom cards and invitations arena, she's letting me put together her card this year {so fun!}.  Her request was subway art {also fun!}.  So I have been playing with just the right St. Patrick's Day subway art, with a little cute, a little sassy, and little bit of those Irish blessings!

Since I already had the subway art created, might as well throw it up on Etsy as a printable, frameable piece, no?

Want one of these for yourself?  Just visit my Etsy shop: www.etsy.com/shop/ChristysCustomsBlog ! I have them with and without the chevron background in 5X7, 8X10 and letter sized (8 1/2X11).

{Ptssss... If you follow me on facebook and send me a private message there, I just may throw one your way for free! Cheers!}

Friday, August 9, 2013

In the Nest, Ready to Learn Classroom Behavior Chart

Since school in getting ready to start for most of the world (we have already been back two weeks now!), I figured I should share our little behavior chart for our classroom so some of you all could take advantage!!  We are doing a little birdie theme, which I may get myself together enough to take pictures and show, but for now, here is the behavior chart!!  The students each have a clothes pin with their name and they all start out on green (woo hoo!) and can move up for good choices and down for poor choices!  Ours hangs on one of our cabinet doors and works wonderfully!
You can download the prints HERE.  I sent them to Costco and ordered 8X10 prints (there are four in all and costs about $6 to print).  You will have to cut the red from the purple.  I glued down the pieces on some butcher paper in the correct order and laminated to help make it more durable. 

Hope you enjoy!

Little Pumpkin Baby Shower Invites- Free and Customizable!


So my sister in law is pregnant with a beautiful little girl... which means I get to help throw the baby shower {fun, fun, and more fun!}.  Since the shower will be in October, we are going to have a 'Little Pumpkin' shower.  Since I am in charge of the invites, I kind of went crazy making all sorts of invitations and letting her choose a style that she liked best.  And since I have all these already made, why not share them??? 
To use these backgrounds, just download them HERE and open them in a picture editing software that allows you to add text.  My favorite and easy to use program is Google's free Picasa program.  Once you add your text and save as a jpeg file, you can send to your favorite print shop (mine is Costco, lustre finish).  I personally use a wholesale postcard printing service (like Overnight Prints) which not only gives you a nice sturdy card stock, but also allows you to add details for the invitation on the back and can usually be ordered with envelopes!  Oh- and is super cheap... but will take longer to get through the snail mail!

Let me know if you are able to use these for your baby shower- I would love to see!!  Also, any questions, just let me know!  Enjoy and happy showering :)


 PS: Many of these design elements and fonts are free to use for those of us amateurs who are not making things like these for money!!  I would like to thank just a few of these awesome places for having free goodies!!

Persnickety Prints
Kimberly Geswein Fonts
Pugly Pixel
The Coffee Shop Blog


Saturday, June 1, 2013

A Shabby Chic First Birthday

Little sis turned one this month.  I had a blast throwing all the details of her party together... a shabby chic sorta affair with a little country garden feel to it.

The Invites
I design the invites myself using Photoshop Elements and use a business postcard printer online to print- for about $25 I can get 50 of these on heavy duty card-stock, rounded corners, and envelopes!  They also print the back- so all the details (and more adorable pictures) go on the reverse side!  Love this little trick to help save money!!
 Making the Banners
I went to our librarian at school to see if she had any discard books (older books usually missing pages) and I was in luck!  I used old book pages, packaging paper (which is kind of a paper bag feel and you can get at any hardware store), and I printed out the letters on 4X6 lustre finish paper at Costco.  To make things go quicker, I used a spray glue I had left over to throw them together- and I loved how they turned out!!
The Outfit
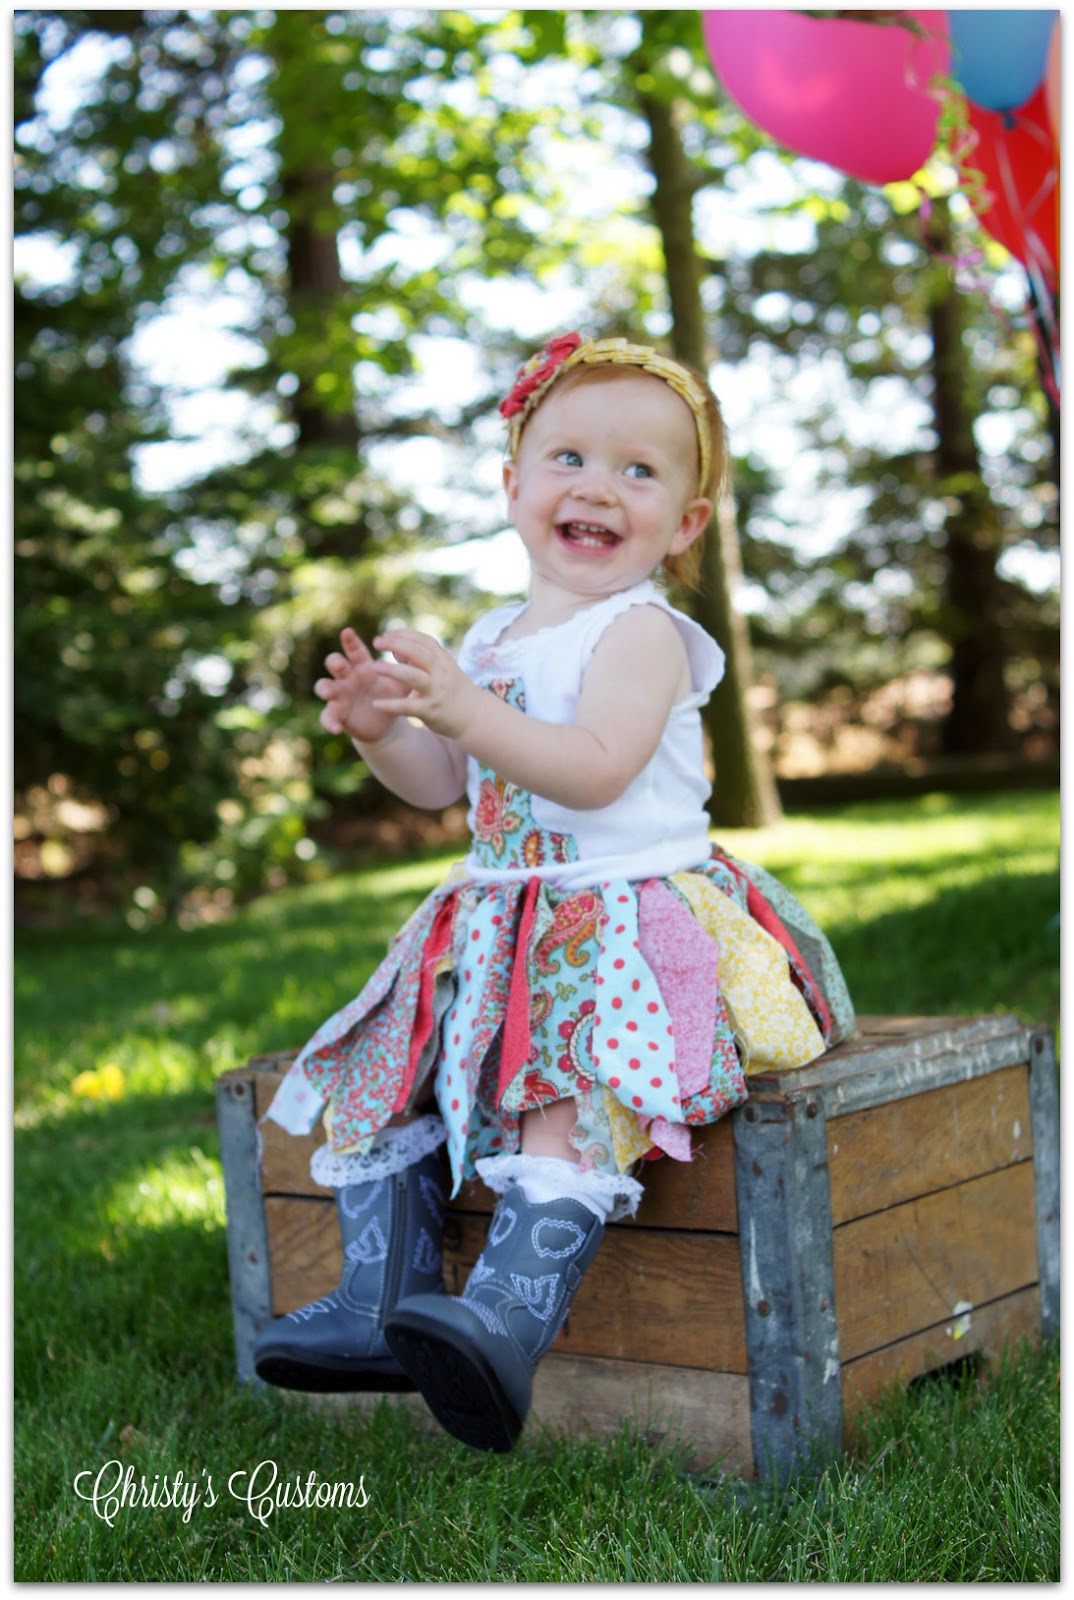
I made this shabby chic little outfit {the tutorial is HERE} for under twenty dollars and only about an hour of time.  It turned out super cute when paired with boots and some ruffly socks!


The Decor
I went with a country garden feel... think burlap, red checkers, and mason jars!!  I found favors in Target's dollar section: hand shovels and rakes, bubble wands, and pin wheels.


The Grub
The hubby got up early to smoke us a pork shoulder... YUM!  So the menu included chips and salsa to snack on, BBQ Pork sandwiches with a homemade Carolina style BBQ sauce, sweet baked beans, salad, watermelon, and a fresh strawberry-cucumber water, lemonade and sweet tea to drink.  The cake was a delicious dark chocolate with strawberry filling with a smoosh cake in white cake for the munchkin... so fun!  A perfect welcome to summer :)


I had a blast putting it all together and most importantly, little sis had a great time with family and friends!!


PS- I am all about sharing... you can download all of the following tags and birthday banner letters HERE (They are JPEG files designed to print on 4X6... I use Costco and choose lustre finish which is similar to matte)!  Just share the love by following my blog :)


Friday, April 19, 2013

A Tribute to Moms; Chalkboard Printable

A little tribute to all of us moms out there tirelessly working for our little munchkins!  Meant to be printed by your local printshop as an 8X10, simply add to your favorite frame for a sweet recognition of all the hard work our moms do!!  Happy early Mother's Day!


Click HERE to download your free print!


Friday, April 5, 2013

An April Chalkboard {FREE!} Printable

I have been playing each month to create a new chalkboard printable, the idea being that by the end of the year I will have one 8X10 picture frame that contains a new cute monthly chalkboard written phrase which can easily be switched out.  On to April... and what phrase suits April better than this one!?!
Either print from your home computer or send to your local print shop to have printed as an 8X10 (I prefer this choice since you can often choose a matte or lustre finish!)

To download, just follow this LINK and enjoy :)


Looking for previous month's printables???
January
February
March


Thursday, March 14, 2013

DIY Superhero Capes {Printable Templates Included!!}

Well big sis wanted a superhero birthday party for her 4th... so what else was there to do but to make superhero capes!!! {You can see her party here}

I searched on-line and found a few tid-bits here and there, but nothing that really seemed to help all that much, soooo, we basically started from scratch!  Lucky for you, if you ever need to make a superhero cape for your little angel, I saved everything I did right here!

The first main decision came down to time and money (doesn't it always!?).  I decided to go with a felt cape versus a shinny material because 1. it is super cheap and 2. it won't fray so you don't have to break out the sewing machine!  Once I decided that, I gathered the following materials...

Materials:
Felt by the yard (2ft. cut length per every two capes needed)
A pack of assorted color felt sheets for the emblems
Spray Adhesive
Velcro squares or 1" Velcro to cut
Christy's Customs Superhero Cape Template
Christy's Customs Superhero Cape Shapes and Letters Templates


{The template above is designed to print out on normal 8 1/2 X 11 printer paper.  Download the template by clicking on the above link and saving each of the seven pieces.  When printing, treat the JPEG file as a picture.  Choose 8 1/2 X 11 paper size and choose BORDERLESS printing.  The borderless printing will preserve the correct proportions of the template and is usually only an option when printing pictures.  I personally would choose to print in draft to save ink.  Once the template is printed, you simply lay the pieces out and use tape to hold them together.  Cut along the dark line to get your cape template.  This cape size works well for 3-6 year old children}

Lay out your felt (most is sold doubled over- I left mine so each template cut out resulted in two capes) placing the template on top.  Use a washable marker to lightly trace the template.  Cut out.


Using the Shapes and Letters template above, print out the shape for a background and letter for the child's first name.  Cut out and use for templates on the assorted color felt choices.  Using spray adhesive, coat the back of the felt shape, place on cape, and felt letter, also placing on cape.


Now the Velcro to hold the cape on... oh how I wish I could tell you to spray the back of the Velcro and stick it on too... but you will need something a bit stronger than spay adhesive to hold on the Velcro... ours pulled off after the first hour or so.  A few stitches would be best to add on your little cape neck closers!

And wha-la!  Happy little superheros!

For age reference... big sis had just turned 4 in this picture, while cousin is 6 1/2.  The capes seemed to work well for both sizes!


And- KAPOW!  There you have it!  Super simple.  I did 8 of them in just a couple hours one evening and gave them as party favors.  I wish I had taken a picture of all of them, but in the rush of the party, I forgot- oh well! 

I'd love to hear if you use the templates... I'd love to know that someone else got use out of them too :-)  So please share if you do!


Friday, February 15, 2013

A March Chalkboard Printable

In my quest to do a printable for each month of the year that can easily be switched out, here is March!  I found this super cute Irish blessing and thought it would be perfect for a March printable!
This is meant to be printed as an 8X10- just send it to your local print shop.  I keep mine all in the frame together so they can just be switched out as the year goes by.  Click HERE or on the picture itself to get the downloadable file!

{Pssss- Looking for Subway or Chevron St. Patty's Day Printables- we've got em!!}
http://christyscustoms.blogspot.com/2014/02/a-printable-subway-art-with-chevron.html


Looking for January or February??  Just click on these little guys :)
Enjoy, and as always, thanks for stopping in!


Tuesday, February 12, 2013

Creating Our Own DIY Handprint Valentines

I have always made my hubby's Valentines.  He may think I am crazy, he may hate them, he may adore them- I have no clue, but since we first started dating, I have always made his Valentines.  Sometimes it has been collages, other times it has just been simple cut out hearts, but almost always it reflects something going on in our lives.  I like to make them... I like creating something with my own two hands instead of buying some card invented by some random person I don't even know.

So a few years back when my oldest daughter came along, it was only natural that daddy get a Valentine from his little girl too.  Well, it's that time of year again and this year we have one more little lady to add in to the mix and our Valentine making has been extended to Grandparents as well (because they just love getting them too!).  Because both girls are still fairly young, I combined both of them into one Valentine and created a fun little design on the computer (that I could just print out multiples of instead of hand writing them all!) to do their hand-prints on.

We used washable Crayola paint and I like to actually paint onto their hands.  This year big sis was able to paint her own hand- HUGE fun, lol!


Big sis had to switch up the colors for each person (of course), but after doing little sis (9 months old) once, I decided she would just have to stay purple the whole time.  We did all of hers in one fell swoop, then let big sis take her sweet time.  They had a blast!.  To back the Valentines, I just used some old scrap-booking paper that I don't plan on using for anything else, glued on our little hearts, and cut with some scallopy scissors.  It really only took us about an hour from start to finish.
After they had time to dry, I went back and wrote each girl's name along with this year's date.

We will be delivering Thursday!  Fun times!  So, I am dying to know- anyone else crazy enough to make their own Valentines each year??


Oh- and if you like the little 'HAND/heart' background I used, you can download it by clicking HERE- it is saved in my google Drive :)
Pin It button on image hover